Discover expert tips and practical advice for optimal T-shirt design placement. Learn how to position logos‚ artwork‚ and text effectively to create professional‚ eye-catching designs that stand out.
Importance of Proper Design Placement
Proper design placement on T-shirts is crucial for visual appeal and professional presentation. It ensures designs are balanced‚ proportional‚ and visually striking‚ enhancing brand messaging and customer perception. Incorrect placement can make designs look cluttered or unprofessional‚ potentially harming your brand’s image. Ensuring optimal placement also considers the garment’s style‚ audience‚ and design type‚ making it essential for creating polished‚ eye-catching products. By prioritizing proper placement‚ you achieve a seamless blend of aesthetics and functionality‚ ensuring your designs resonate effectively with your target audience.
Overview of Popular T-Shirt Design Placements
Popular T-shirt design placements include center chest‚ left chest‚ full front‚ and sleeve designs. Each offers unique benefits: center chest for bold statements‚ left chest for subtle branding‚ full front for maximum impact‚ and sleeves for a modern touch. Proper placement ensures designs are balanced‚ proportional‚ and aesthetically pleasing‚ enhancing both visual appeal and functionality. These placements cater to various design types‚ from logos to intricate artwork‚ ensuring your T-shirt designs stand out and resonate with your target audience effectively.
Popular T-Shirt Design Placements
Explore the most sought-after design placements‚ including center chest‚ left chest‚ full front‚ and sleeves‚ each offering unique styling opportunities for logos‚ artwork‚ and text.
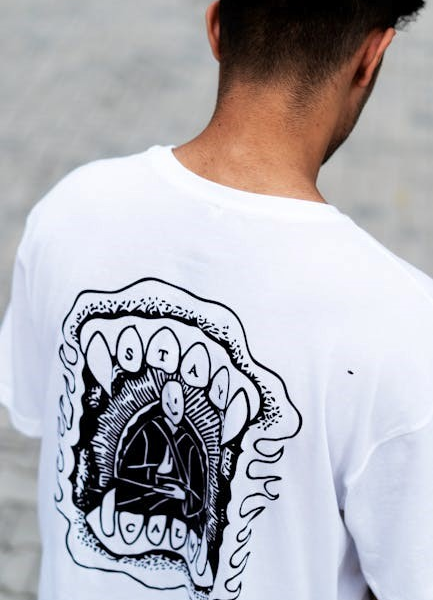
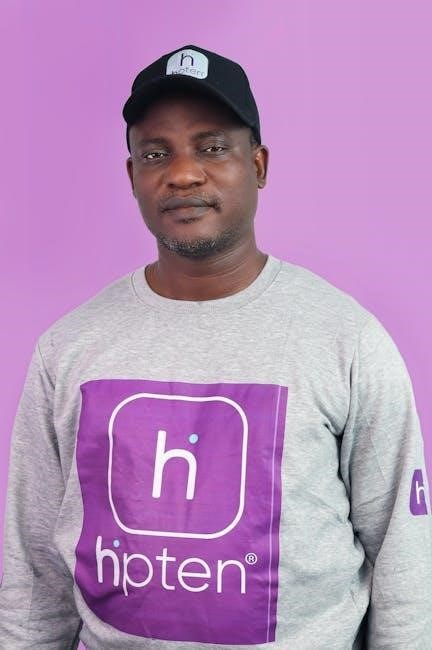
Center Chest Placement
The center chest placement is a highly visible and popular choice for T-shirt designs. It typically places the design about 3 inches below the neckline and 2 inches from the armpit‚ ensuring proportionate sizing. This placement works well for logos‚ bold graphics‚ and text-based designs‚ as it draws immediate attention. For adult shirts‚ the design area is usually around 11 inches wide‚ while youth sizes are slightly smaller‚ at 10.5 inches. Center chest placement is ideal for creating a balanced‚ professional look that avoids overcrowding‚ making it perfect for branding or eye-catching statements that want to make an impact.
Left Chest Placement
The left chest placement is a subtle yet professional option‚ often used for logos or small graphics. Typically positioned 3-4 inches from the left shoulder and 2-3 inches below the neckline‚ this placement is ideal for branding without overwhelming the design area. The design size usually ranges from 4 to 6 inches wide‚ depending on the shirt size. This placement is versatile and works well for both adult and youth shirts‚ offering a minimalist appeal. It’s perfect for those who prefer a clean‚ understated look while still making a statement. The left chest placement is also great for text-based designs or small artwork‚ ensuring a balanced and polished aesthetic.
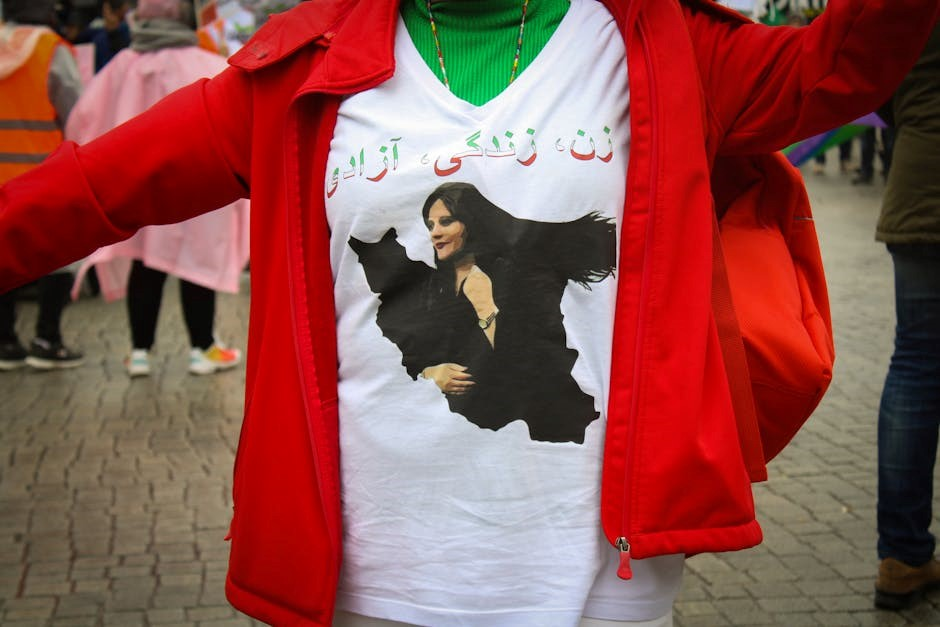
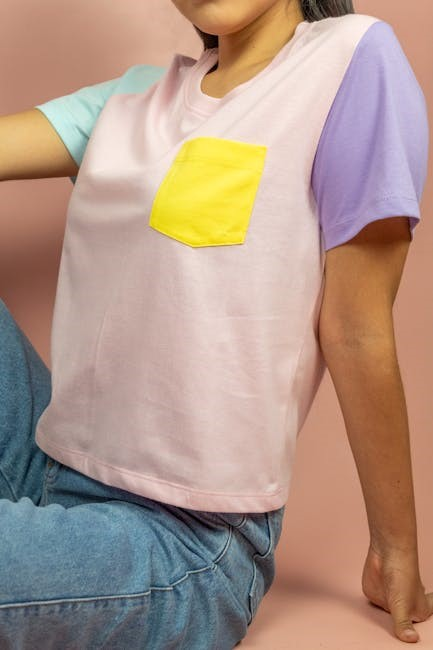
Full Front Placement
Full front placement is ideal for bold‚ eye-catching designs that cover the entire chest area. This placement is great for intricate artwork‚ large logos‚ or detailed graphics. Designs should align with the center chest and extend appropriately to the sides and bottom. The size varies based on the shirt’s dimensions‚ typically spanning 10-12 inches wide for adults. Proper alignment is crucial to ensure the design doesn’t appear off-center. This placement works best for statement pieces‚ making it a popular choice for graphic tees and promotional items. It’s essential to balance the design with the shirt’s proportions to avoid an overcrowded look.
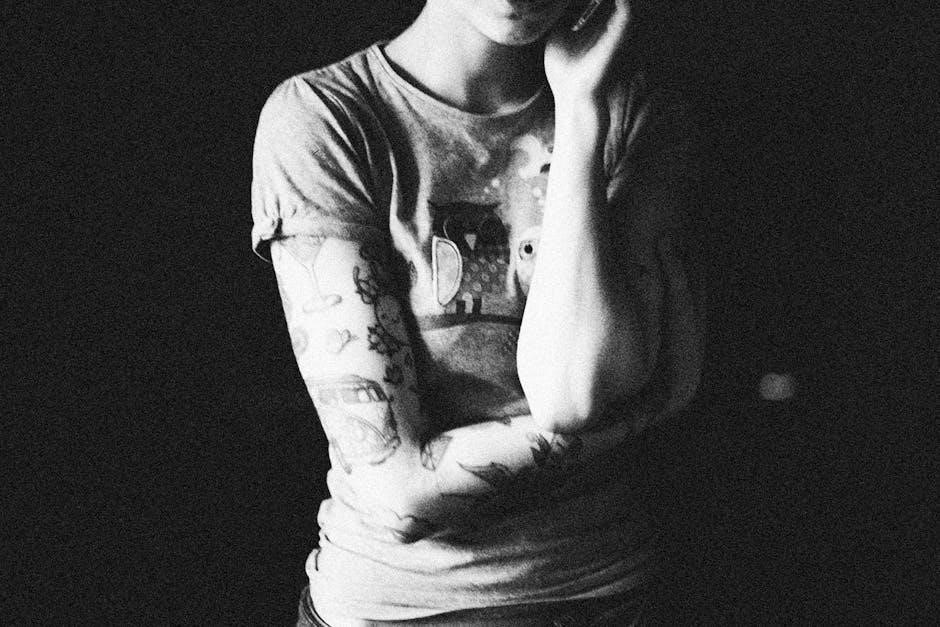
Sleeve Placement
Sleeve placement is a unique and less common option for T-shirt designs‚ often used for smaller graphics or text. Designs are typically positioned 2-3 inches above the sleeve hem‚ ensuring they remain visible without overwhelming the space. Sleeve designs are ideal for subtle branding‚ such as small logos or short phrases‚ and should be sized proportionally to the sleeve length‚ usually 3-4 inches tall. This placement complements other design elements without distracting from the main artwork. It’s a great way to add an extra detail or secondary graphic‚ enhancing the overall aesthetic while maintaining balance and style.

Design Sizing and Positioning
Proper sizing and positioning ensure designs look balanced and professional. Measure garments to align graphics proportionally‚ avoiding overcrowding while maximizing visual impact for polished results.
Measuring for Optimal Design Size
Measuring is crucial for ensuring your design fits perfectly. Start by placing the design 3 inches below the neckline for a balanced look. For adult shirts‚ keep the design between 11 inches wide and 11 inches tall. Youth sizes should be slightly smaller‚ around 10.5 inches. Use a ruler or alignment tool to center the design horizontally‚ ensuring it’s 2 inches from the armpit seams. Avoid overcrowding by leaving space around the edges. Proper measurements ensure your design is proportional and visually appealing‚ making your T-shirt stand out with a professional finish.
Proportional Placement Based on Garment Size
Proportional placement ensures designs look balanced on any garment size. For adult T-shirts‚ center designs 3 inches below the neckline‚ sizing them between 11×11 inches. Youth sizes require slightly smaller designs‚ around 10;5 inches‚ to maintain a polished look. Measure from the shoulder seam to the armpit to avoid oversized prints. Align designs symmetrically‚ keeping them 2 inches from the armpit seams. This proportional approach ensures designs complement the garment without overwhelming it‚ creating a professional and visually appealing finish for all sizes. Proper sizing enhances both aesthetics and wearability‚ making your T-shirt designs stand out.
Best Practices for Different Design Types
Optimize logo placement on the left chest for subtlety‚ center chest for bold statements‚ and sleeves for unique appeal. Ensure artwork is balanced and proportional‚ avoiding overcrowding. Text-based designs should be clear and readable‚ placed strategically for maximum visibility and impact. Proper alignment and sizing ensure professional results across all design types.
Logo Placement Best Practices
For a professional look‚ place logos on the left chest (3-4 inches below the neckline) or center chest for bold statements. Ensure the design is proportional to the garment‚ typically 3-4 inches in size. Position logos 2-3 inches below the neckline for a balanced appearance. Avoid overcrowding by keeping the design simple and centered. Use high-resolution files to maintain clarity. Consider the target audience and brand identity when choosing placement. For a subtle look‚ smaller logos (2-3 inches) on the sleeve or upper back are effective. Always align logos symmetrically for a polished finish.
Artwork Placement Tips
Position intricate artwork centrally or slightly off-center for visual impact. Full-front designs work best for bold‚ eye-catching graphics‚ while upper back placements offer a dramatic flair. For smaller designs‚ consider sleeve or shoulder areas to add detail without overwhelming the garment. Ensure artwork is proportional to the shirt size‚ avoiding overcrowding. Centered designs create a balanced look‚ while asymmetrical placements can add uniqueness. Use high-resolution files to maintain clarity. Test placements on mockups to ensure the design aligns with the shirt’s dimensions. Balance creativity with practicality to achieve a polished‚ professional finish that enhances the artwork’s appeal.
Text-Based Design Placement
For text-based designs‚ centering the text on the chest or back ensures high visibility and readability. Place slogans or phrases 3-4 inches below the neckline for a balanced look. Avoid overcrowding by keeping text concise and proportional to the shirt size. Use bold fonts for larger text and subtle styles for smaller phrases. Consider left chest placement for a professional‚ minimalist approach. Ensure spacing between lines is consistent for a clean appearance. Vertical text can add a unique twist‚ while horizontal placements remain timeless. Test different placements to find the most impactful arrangement for your message.

Tools and Resources for Precise Placement
Utilize a T-Shirt Ruler Guide and alignment tools to ensure designs are centered and proportionate. A tech pack provides detailed specifications for accurate logo and artwork placement‚ ensuring professional results and consistency across all garments.
T-Shirt Ruler Guide and Alignment Tools
A T-Shirt Ruler Guide is an essential tool for precise design placement‚ ensuring your artwork is centered and proportionate. It provides measurements for adult and youth sizes‚ helping you align designs accurately. Use alignment templates or laser guides to achieve professional results. These tools prevent errors like uneven positioning or misalignment. For bulk orders‚ they streamline the process‚ saving time and ensuring consistency. Invest in a high-quality ruler guide to maintain precision and elevate your custom T-shirt designs to a professional level.
Using a Tech Pack for Design Specifications
A tech pack is a detailed document outlining all technical aspects of your T-shirt design‚ including placement‚ sizing‚ and materials. It serves as a blueprint for manufacturers‚ ensuring consistency and accuracy. Include specifications like design dimensions‚ placement measurements‚ and fabric requirements; This tool is crucial for communicates your vision effectively to production teams. A well-structured tech pack helps avoid errors‚ ensuring your designs are printed correctly every time. Use it to streamline production and maintain high-quality results for your custom T-shirt designs.
Design Placement for Specific Audiences
Design placement varies by audience‚ with adult designs often favoring bold‚ central placements‚ while youth designs lean toward smaller‚ upper-chest placements for a younger appeal.
Adult vs. Youth T-Shirt Design Placement
Adult and youth T-shirt design placements differ significantly. Adult designs often feature bold‚ central placements like center chest or full front for maximum visibility and impact. Youth designs‚ however‚ favor smaller‚ more subtle placements‚ such as the upper chest area‚ to create a younger‚ trendier look. For adults‚ designs typically start about 3 inches below the neckline‚ aligning with the armpit seam for balance. Youth designs are placed slightly higher‚ around 2 inches below the neckline‚ ensuring proportionality. Consider demographics and design goals when choosing placement to appeal effectively to your target audience.
Gender-Specific Design Placement
Gender-specific design placement is crucial for creating appealing T-shirts tailored to different demographics. Men’s designs often emphasize bold‚ central placements like the center chest or full front for a strong‚ eye-catching look. Women’s designs‚ however‚ may favor slightly higher or more asymmetrical placements to complement fitted silhouettes. Sleeve designs are popular for both genders but may vary in size and positioning. Consider garment fit and target audience preferences when selecting placement to ensure the design enhances the wearer’s style and comfort. This tailored approach ensures designs are both functional and aesthetically pleasing for their intended audience.

Advanced Design Placement Techniques
Explore innovative methods like asymmetrical designs‚ wrap-around prints‚ and layered elements to create visually striking T-shirts that push creative boundaries while maintaining balance and visual appeal.
Unique and Creative Placement Ideas
Explore innovative design placements to make your T-shirts stand out. Consider asymmetrical designs‚ wrap-around prints‚ or off-center layouts for a modern look. Place artwork near the upper back or along the sleeve for a trendy‚ less traditional vibe. Use the space below the collar or above the hem for subtle yet impactful branding. For bold statements‚ try overlapping designs across the shoulder or chest. Experiment with vertical text or diagonal graphics to add visual interest. Measure carefully to ensure balance‚ and use tools like a T-Shirt Ruler Guide for precise alignment. These creative placements can elevate your designs and appeal to fashion-forward audiences.
Combining Multiple Design Elements
Combining multiple design elements can create visually striking T-shirts‚ but balance is key to avoid overcrowding. Start with a focal point‚ like a bold logo on the chest‚ and complement it with smaller graphics on the sleeves or back. Ensure designs are proportionate and aligned properly using tools like a T-Shirt Ruler Guide. For example‚ pair a subtle text line above the hem with a vibrant artwork on the chest. Experiment with contrasting colors or textures to add depth. Always measure and preview placements to maintain harmony and professionalism in your designs. This approach ensures a cohesive look that appeals to diverse audiences.
Common Mistakes to Avoid
Avoid overcrowding‚ improper alignment‚ and incorrect sizing. Ensure designs are balanced‚ centered‚ and proportional to the garment. Double-check placements before printing to prevent errors and ensure professionalism.
Overcrowding the Design Area
Overcrowding the design area is a common mistake that can make a T-shirt look cluttered and unprofessional. When too many elements are crammed into one space‚ it becomes difficult to focus on the main message or image. This can overwhelm the viewer and detract from the overall aesthetic. To avoid this‚ it’s essential to balance design elements and leave adequate white space. Ensure that each element has enough room to breathe‚ allowing the design to be visually appealing and easy to interpret. Proper spacing enhances readability and ensures the design is both attractive and professional. Always prioritize simplicity and clarity.
Improper Alignment and Centering
Improper alignment and centering can significantly undermine the professionalism of a T-shirt design. When designs are not properly centered or aligned‚ they can appear unbalanced and amateurish. This is particularly noticeable in logos and text-based designs‚ where even slight misalignment can be distracting. To avoid this‚ use alignment tools or rulers to ensure precise placement. Measure the garment carefully and double-check the design’s positioning before printing. Proper alignment ensures a polished‚ professional look and enhances the overall appeal of the design. Always prioritize balance and symmetry to create visually pleasing results.
Case Studies and Examples
Explore real-life applications of effective design placement strategies through successful case studies. These examples demonstrate how optimal placement enhances visual appeal and brand recognition in T-shirt designs.
Successful Design Placement Examples
Effective design placement can elevate a T-shirt’s appeal. For instance‚ a bold logo centered on the chest creates immediate brand visibility‚ while a subtle left chest design offers a professional look. Sleeve placements add a modern touch‚ allowing for complementary artwork without overcrowding. Full front designs are ideal for intricate visuals‚ ensuring the artwork stands out. These examples demonstrate how strategic placement enhances both aesthetic and functional goals‚ making the design more impactful and aligned with the intended audience’s preferences. By studying these cases‚ designers can apply proven techniques to achieve professional‚ eye-catching results that resonate with their target market.
Real-Life Applications of Placement Strategies
Strategic design placement enhances functionality and appeal in real-world applications. For example‚ logos on the center chest or left chest are ideal for branding‚ while sleeves offer space for complementary artwork. Full front designs showcase intricate visuals‚ attracting attention without overcrowding. Proper alignment and balance ensure designs look polished. These strategies are widely used in custom apparel‚ from casual wear to promotional items. By considering the target audience and garment style‚ designers can apply these techniques to create cohesive‚ professional looks that resonate with wearers. This approach ensures designs are both visually appealing and aligned with their intended purpose.
Mastering T-shirt design placement is key to creating professional‚ impactful designs. Balance‚ proportion‚ and alignment ensure your artwork stands out. Follow these tips for polished results every time.
Key Takeaways for Effective Design Placement
Effective T-shirt design placement balances aesthetics and functionality. Measure garments precisely to ensure proportional sizing‚ and align designs centrally for a polished look. Consider the target audience and garment style when choosing placement locations. For logos‚ the left or center chest offers visibility and professionalism‚ while full-front designs make bold statements. Avoid overcrowding and ensure proper alignment to maintain a clean appearance. Use tools like rulers or tech packs for accuracy. Testing designs on actual shirts can help refine placement. Remember‚ balance and proportion are crucial for creating visually appealing and professional results.
Future Trends in T-Shirt Design Placement
Future trends in T-shirt design placement emphasize innovation and personalization. Expect increased use of 3D design software for precise placement previews and augmented reality tools for virtual try-ons. Sustainable practices will influence placement‚ with eco-friendly inks and minimal waste designs gaining traction. Customizable templates and AI-driven design assistants will streamline the process. Asymmetric and unconventional placements will rise in popularity for unique styles. Additionally‚ micro-placement techniques‚ focusing on small‚ detailed designs‚ will cater to niche markets. These trends will redefine how designs are positioned‚ offering greater creativity and efficiency for designers and businesses alike in the evolving T-shirt customization industry.